How to Create, Secure, and Share an HTTP Tweak Configuration from the Web Panel
A complete written companion to our Web Panel tutorial: create a configuration, add compatible tweaks and servers, set client access rules, and import it through HTTP Tweak Cloud.
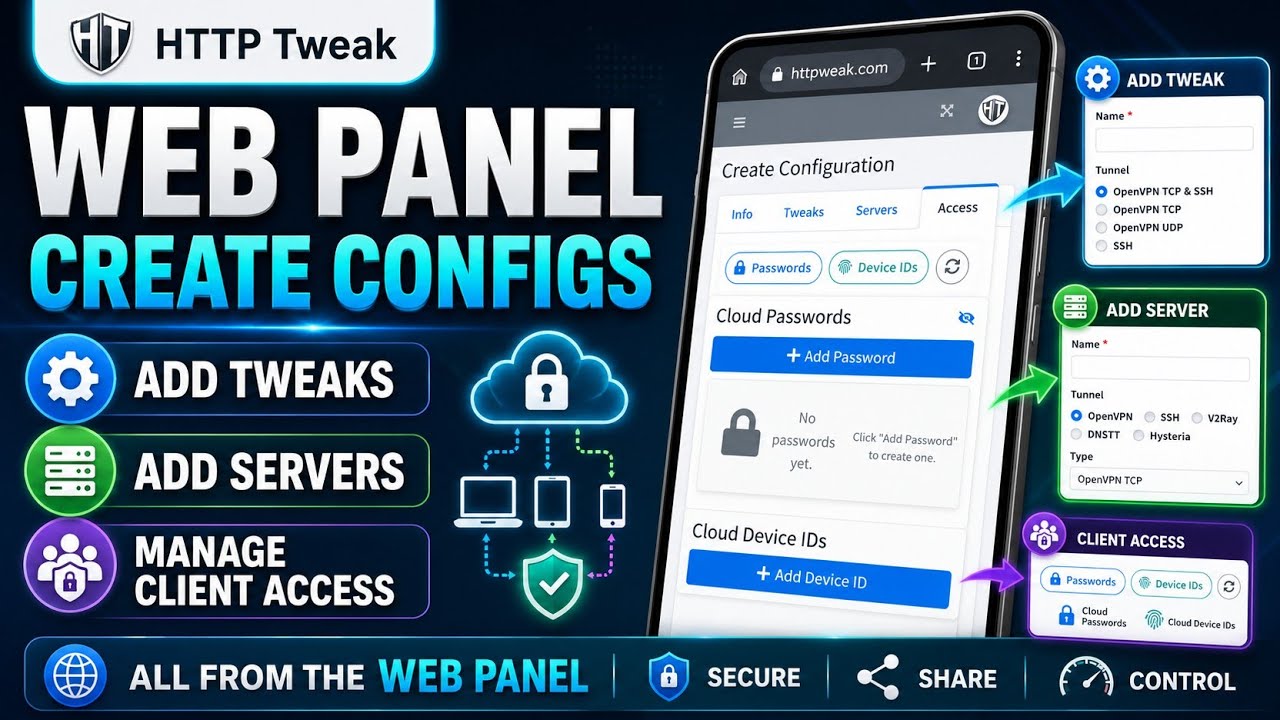
This is the written companion to our HTTP Tweak Panel configuration tutorial. It follows the same complete workflow shown in the video: create a configuration in the Web Panel, add its tweak and server, choose client-access controls, then import the configuration on an Android client through Cloud import.
The video uses a phone browser, but the same Panel pages, tabs, and field names are available on a larger screen. Use this guide as a checklist while you work rather than trying to pause at every screen in the video.
Keep access material private. Only add server accounts, profiles, private keys, UUIDs, passwords, and endpoints you are authorized to use. A configuration key is a delivery mechanism for a configuration; treat it as controlled access information and share it only with the intended recipient.
What you will finish with
By the end, you will have:
- A named configuration in the HTTP Tweak Web Panel.
- A compatible tweak that describes the transport settings.
- A compatible server that supplies the endpoint or profile.
- Optional Cloud Password and Cloud Device ID controls for a client.
- A configuration key that the client can import through Import Cloud.
The Web Panel organizes and delivers a configuration. It does not create an SSH, VPN, proxy, or V2Ray account for you. The remote account and connection details must already be valid and authorized.
Before you start
Have these ready before opening the Panel:
- an HTTP Tweak Web Panel account that can create configurations;
- an Android device with the HTTP Tweak app for the client-side check;
- authorized server or profile information;
- the tunnel family and protocol the information requires, such as OpenVPN, SSH, V2Ray, DNSTT, or Hysteria;
- matching transport values where applicable, including payload, SNI, TLS, proxy, resolver, or profile data;
- the client device ID only if you plan to use a Cloud Device ID lock.
Do not invent placeholder connection values just to complete a form. A configuration can save successfully even though its remote endpoint, account, DNS, firewall, or transport settings are not usable.
Understand the four configuration tabs
Once you open a configuration, the Panel separates its work into four tabs:
| Tab | Purpose |
|---|---|
| Info | Name the configuration, copy its Cloud import key, and review configuration-level controls. |
| Tweaks | Add the transport instructions the app will use. |
| Servers | Add the endpoint or profile that works with a tweak. |
| Access | Create Cloud Passwords and Cloud Device IDs when you want to control client access. |
Work in that order for a new configuration. It keeps the resources easy to identify and gives you a simple place to diagnose a missing or incompatible item later.
Step 1: Open Configurations and create a configuration
- Sign in to the HTTP Tweak Web Panel.
- Open the navigation menu and select Configurations.
- Select Add Config.
- In the editor that opens, enter a clear, durable name. For example, use a location and purpose such as
SG SSH - JulyorTeam VLESS Testrather thanNew Config. - Save or continue with the configuration editor.
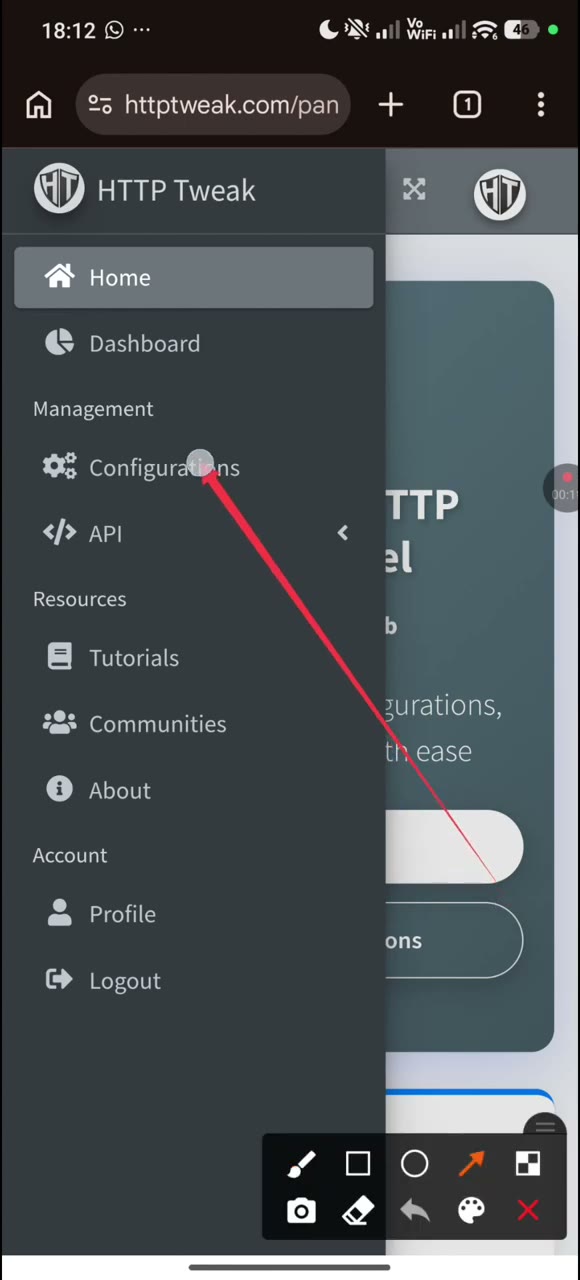
A clear name matters when you later issue a key to a client, rotate an upstream account, or keep several tunnel types in the same Panel account.
Step 2: Set the basic configuration information first
The Info tab contains the configuration name, its Config Key (Cloud import), and optional behavior controls.
- Confirm the name is correct.
- Leave the generated Config Key alone; it is read-only. Use the copy or QR controls only when you are ready to deliver the configuration.
- For a first test, keep optional restrictions disabled until the tweak and server work as expected.
- Add an expiry, message, app restriction, update URL, or other policy only when it matches your actual delivery rules.
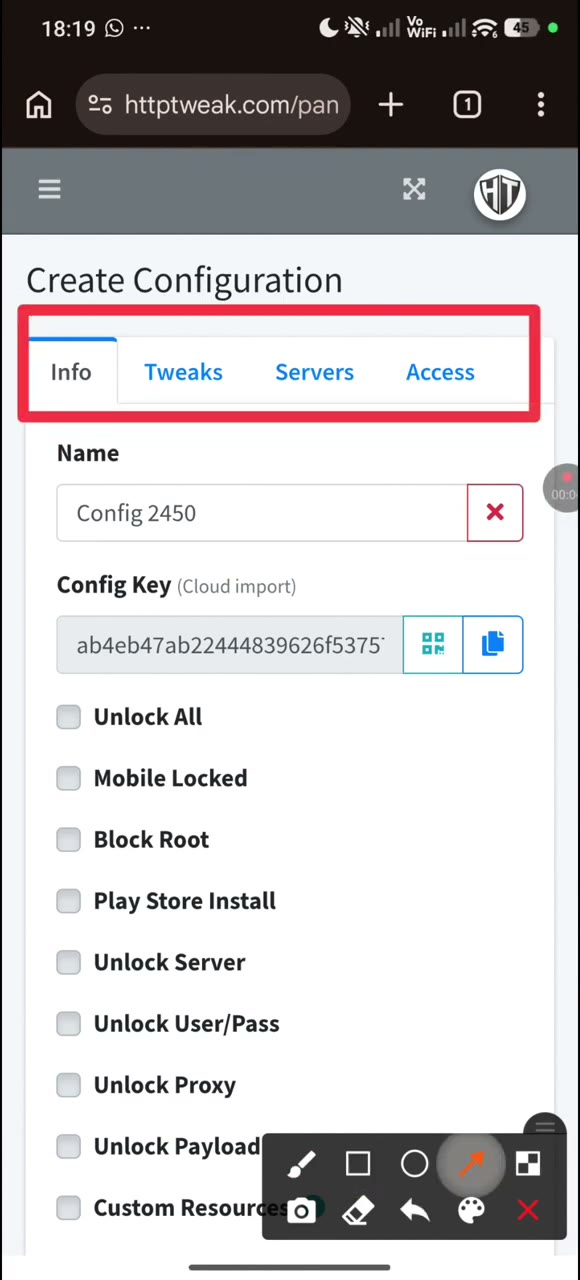
Choose controls deliberately
The Info tab includes controls such as Unlock All, Mobile Locked, Block Root, Play Store Install, Unlock Server, Unlock User/Pass, Unlock Proxy, Unlock Payload, and Custom Resources. These are policy choices, not a required setup checklist. Turn on only the restriction or capability you understand and intend to support.
For example, use a device or password policy when you need controlled delivery. Do not enable a lock merely because it looks more secure; test the exact client path before sharing the key with a user.
Step 3: Add the tweak that describes the transport
A tweak tells HTTP Tweak how to use a connection. It is separate from the actual server account or profile.
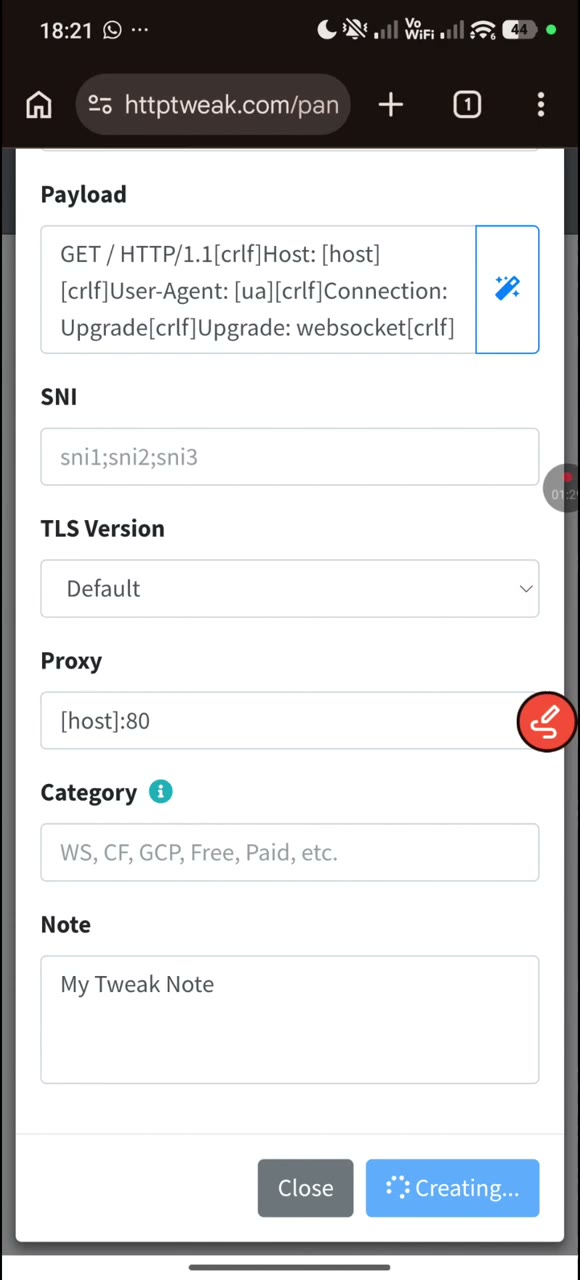
- Open Tweaks and select Add Tweak.
- Give the tweak a meaningful name, such as
SSH WebSocketorVLESS WS. - Select the required Tunnel family: OVPN/SSH, V2Ray, DNSTT, or Hysteria.
- Enter only the values supplied for that transport.
- If you use categories, enter a category that you will also use on the matching server.
- Add an internal note if it will help you identify the source or purpose later, then select Create Tweak.
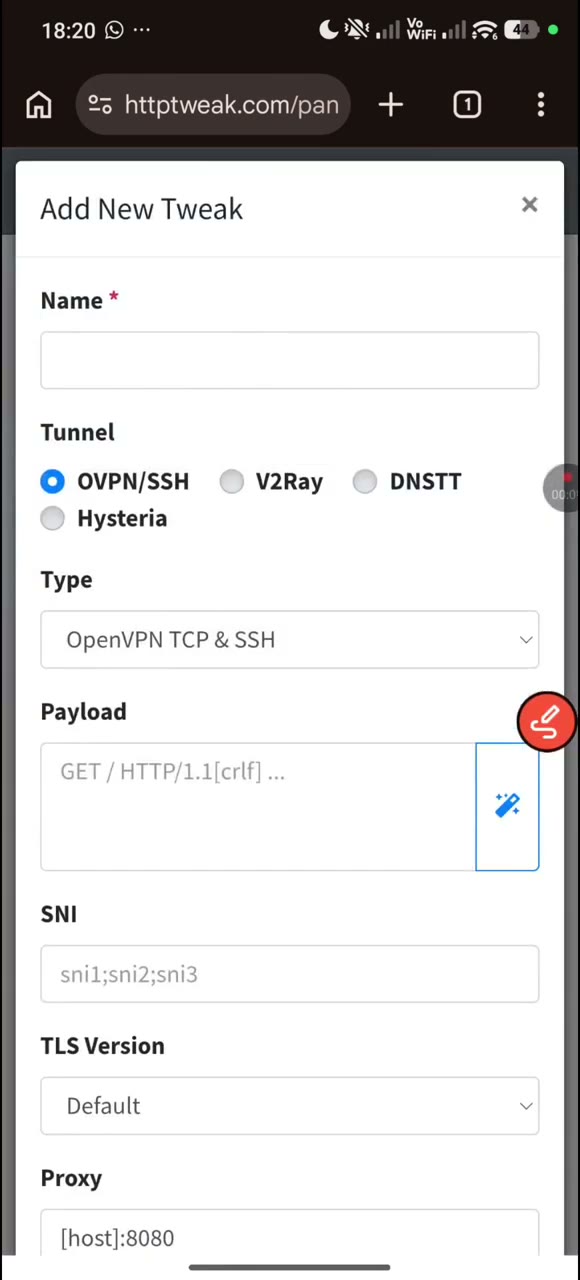
The form changes with the selected tunnel. The video shows that a tunnel choice exposes only the fields that apply to it.
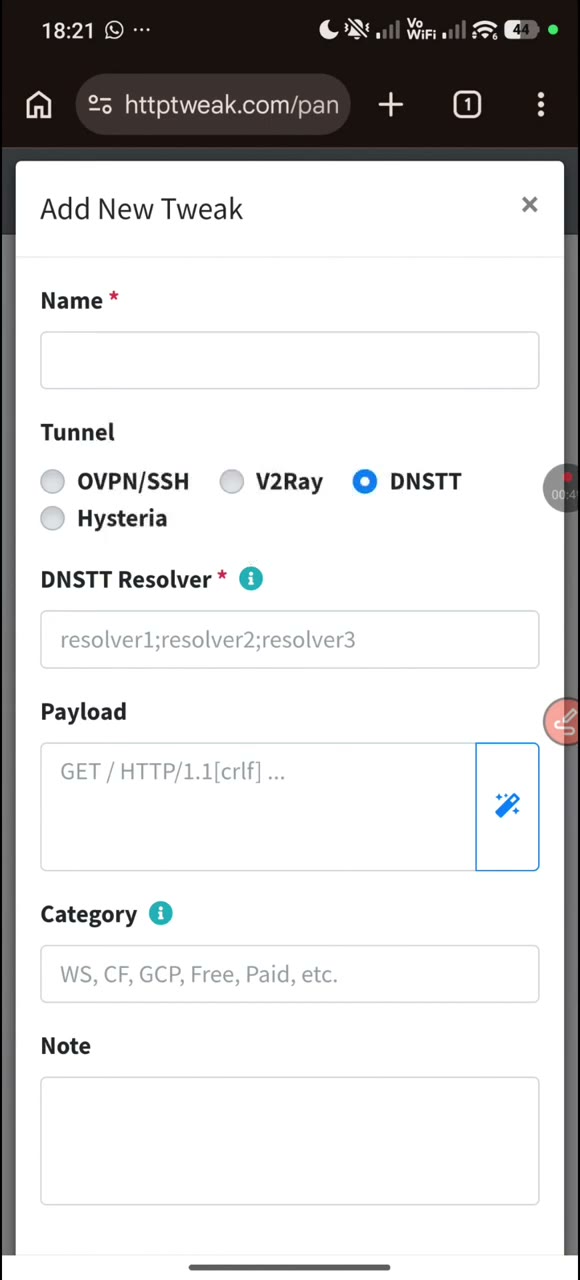
Use the supplied information as follows:
| Tunnel family | Typical tweak details |
|---|---|
| OVPN/SSH | Select the subtype, then provide a payload, SNI, TLS version, and proxy only when your authorized setup requires them. |
| V2Ray | Select the matching V2Ray protocol and add the bug host only when the supplied profile calls for one. |
| DNSTT | Enter the required resolver and any associated payload values. |
| Hysteria | Use the Hysteria-specific option only for a connection designed for it. For hysteria2:// or hy2:// profiles, use the V2Ray Hysteria2 choice. |
Keep tweak and server categories aligned
Categories are optional, but they are useful when one configuration contains more than one connection. A server with category WS is shown for a tweak with category WS; a spelling mismatch can make a valid server appear unavailable. Use the same category on the pair, or leave both category fields empty if you do not need filtering.
Step 4: Add the compatible server
The server is the endpoint or complete profile used by the tweak.
- Open Servers and select Add Server.
- Enter a descriptive server name.
- Select the tunnel family that matches the tweak you created.
- Enter the authorized server data for that family.
- Use the same category as the tweak when you are grouping resources.
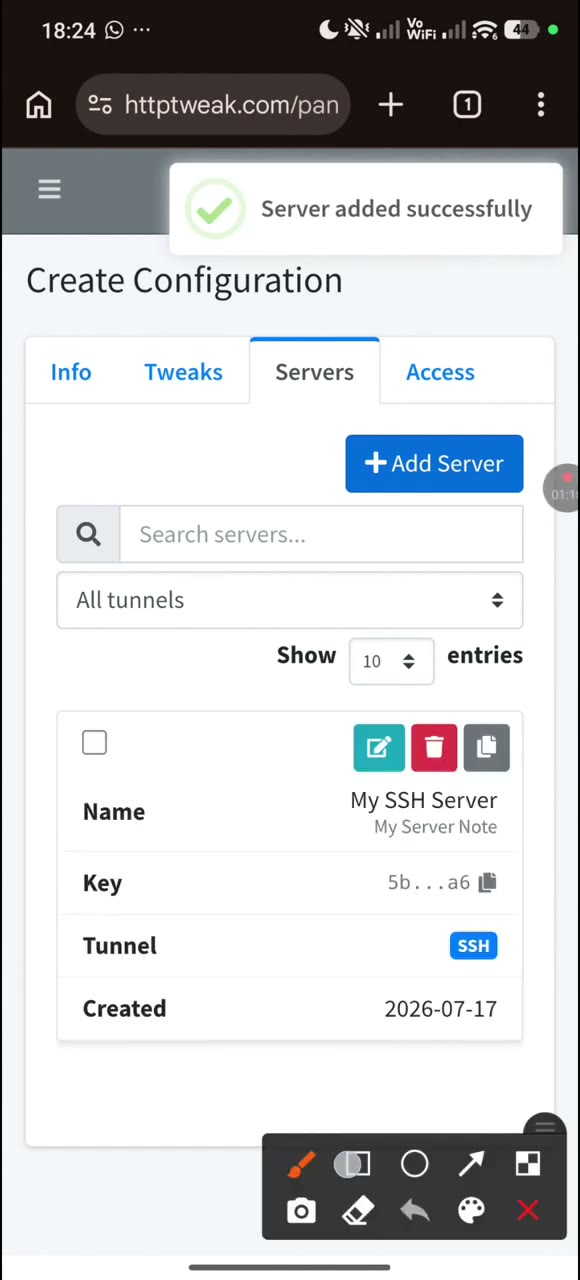
- Add a note if helpful, then select Create Server.
For an SSH server, the form expects the host or IP list, port, username, and password in the shown format. The private-key field is optional. Do not paste real credentials into public screenshots, tickets, or chat messages.
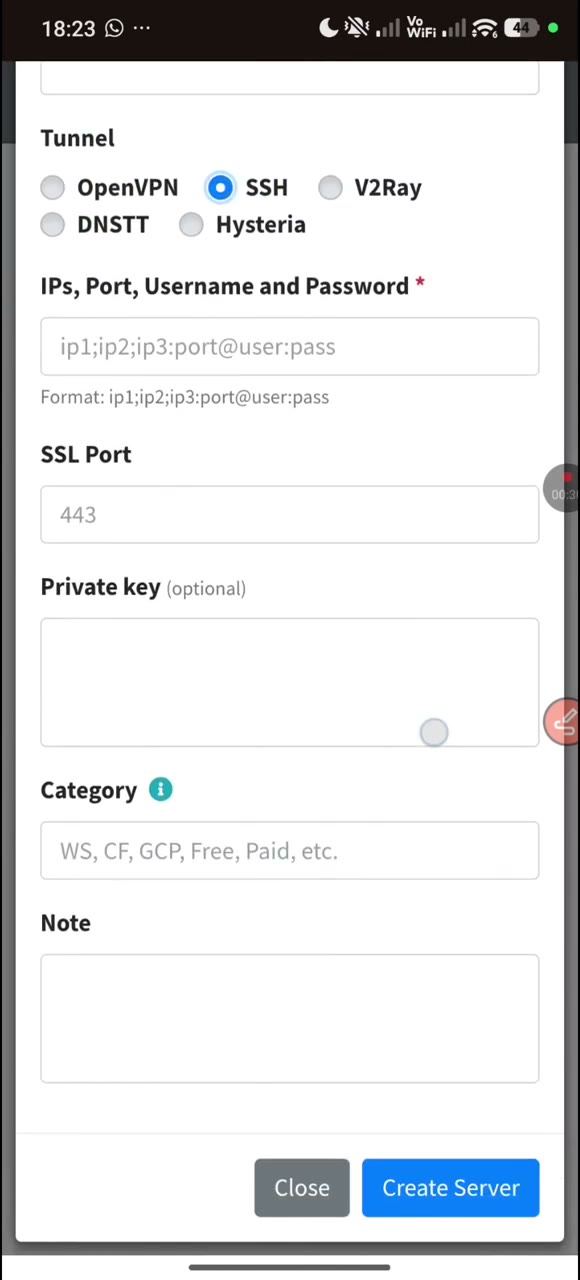
Other tunnel types expose different fields. For example, an OpenVPN server requires its OpenVPN material, a V2Ray server accepts the V2Ray configuration, and a DNSTT server requires the corresponding resolver and key information. Always choose the form that matches the authorized profile rather than trying to adapt unrelated values.
After saving, verify that the new server appears in the Servers list with the expected tunnel badge and name.
Step 5: Add client-access controls only when you need them
The Access tab has two independent tools: Cloud Passwords and Cloud Device IDs. They are optional. A simple owner-only test can use the configuration without adding either one.
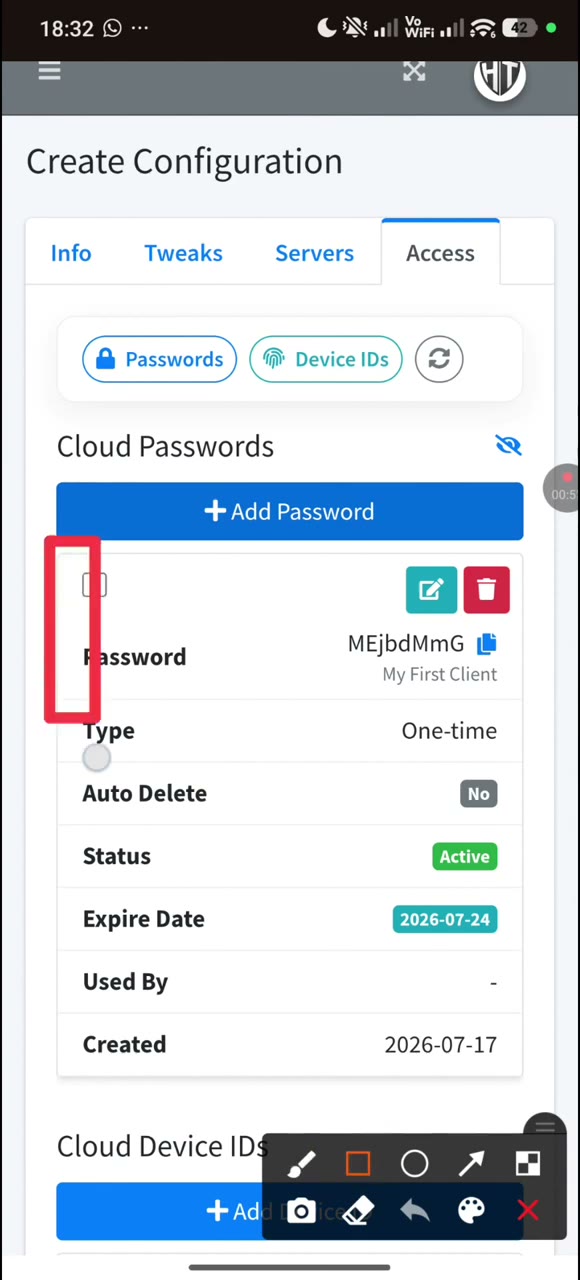
Add a Cloud Password
Use a password when a client should supply a value before Cloud import completes.
- Open Access, select Passwords, then choose Add Password.
- Enter a password or use the Panel generator. A manual password must be at least six characters.
- Choose Reusable for a password that may be used again, or One-time for a single-use delivery flow.
- Set an expiry date and an internal note if needed. The default expiry is one year when no date is entered.
- Keep the password active and save it.
Adding a password automatically enables Cloud Passwords for the configuration. The Access list lets you verify the password type, status, and expiry before you share the configuration.
Add a Cloud Device ID
Use a device ID lock when the recipient should import the configuration only on approved devices.
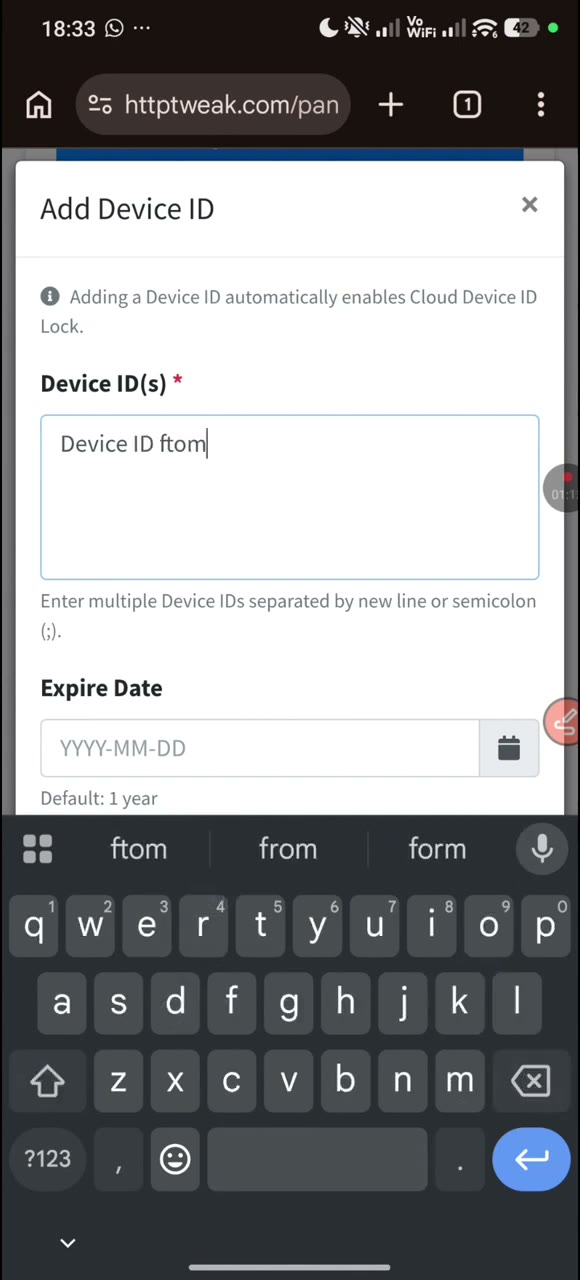
- Ask the intended client for the device ID from their HTTP Tweak app.
- In Access, select Device IDs, then choose Add Device ID.
- Paste one or more exact IDs. Separate multiple IDs with a new line or semicolon.
- Choose an expiry date, optional note, and whether the ID remains active or is removed after use.
- Save the entry.
Adding a Device ID automatically enables Cloud Device ID Lock. An incorrect, expired, inactive, or missing device ID prevents the intended access flow, so copy it exactly and test on the recipient device before distributing more keys.
Step 6: Copy the configuration key safely
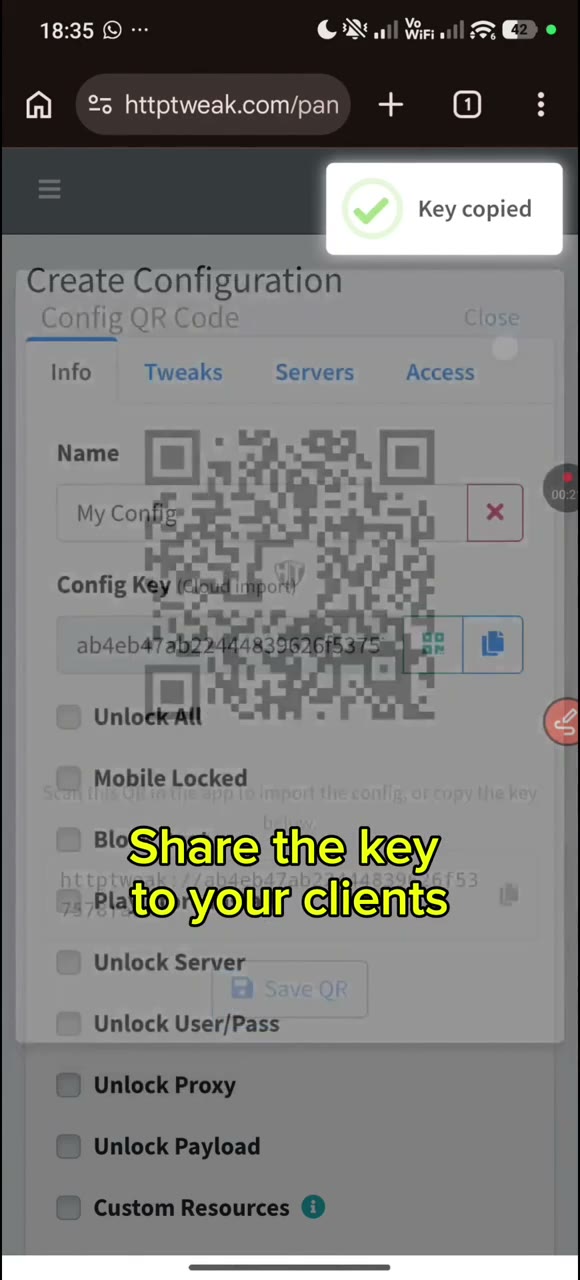
Return to the Info tab and use the copy button beside Config Key (Cloud import). You can also open its QR code when QR delivery is appropriate.
Send the key through a private channel to the intended recipient. Do not post it in a public group, support ticket, or screenshot. If you also created a Cloud Password, deliver that password separately instead of putting both values in the same public or forwarded message.
Step 7: Import the configuration on the Android client
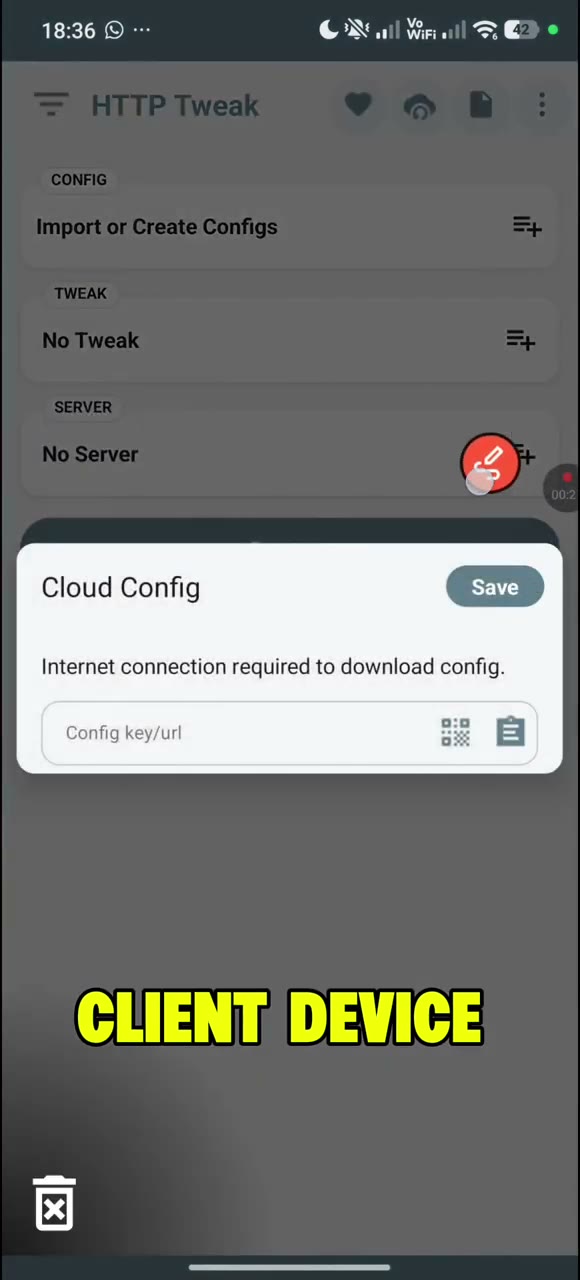
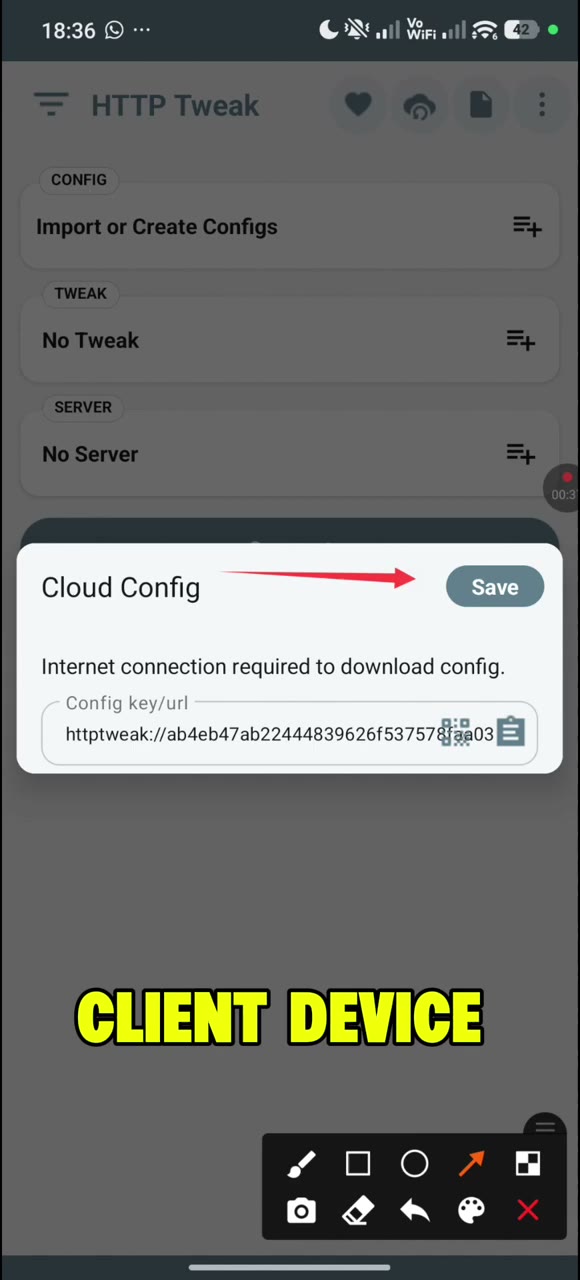
The last part of the video moves to the HTTP Tweak app. The client needs an active internet connection for Cloud import.
- In HTTP Tweak, open the menu beside Import or Create Configs.
- Choose Import Config.
- Select Import Cloud.
- Paste the Config Key or cloud URL into the Config key/url field and select Save.
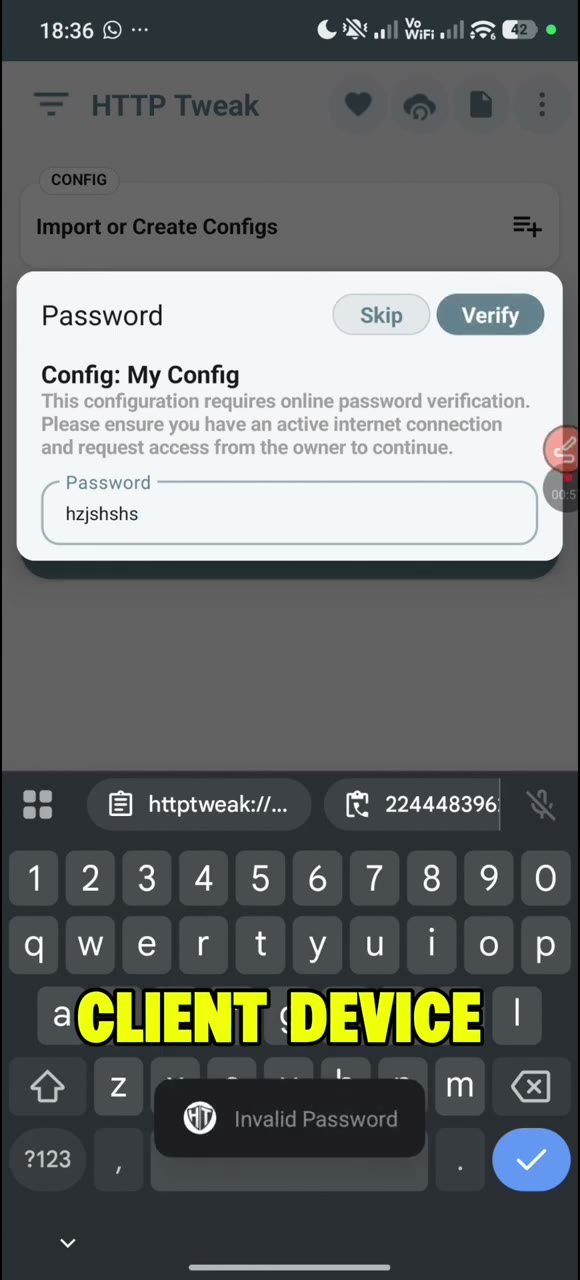
- If the configuration has a Cloud Password, enter the password and select Verify. The client tells you that an internet connection is required for this verification.
- Once the import is accepted, confirm that the configuration, tweak, and server appear in the app. Select the intended pair, then test only with the authorized endpoint and account.
Final handoff checklist
Before you send a configuration to another person, confirm all of the following:
- the configuration name identifies the intended revision;
- at least one compatible tweak and server are present;
- tunnel families and categories match;
- the client has imported the expected configuration key;
- a Cloud Password or Device ID is active only when you intended to require it;
- the password and key were delivered through separate private channels when both are used;
- no real server credentials, private keys, or profile contents were exposed during testing;
- the connection was tested with an authorized account.
Troubleshooting
The client does not see a server for the selected tweak
Compare the tunnel family first. Then compare the category values character for character. A V2Ray server will not be a match for an SSH tweak, and a server tagged WS will not appear for a tweak tagged WebSocket.
Cloud import cannot download the configuration
Check that the client has an internet connection and that you pasted the complete Config Key or cloud URL. Make sure the key came from the current configuration and was not copied from a screenshot with characters missing.
Password verification fails
Confirm that the Cloud Password is active, has not expired, and is the intended type. A one-time password may no longer be usable after its allowed use. Enter the exact value supplied by the configuration owner, including uppercase and lowercase characters.
A device cannot pass the Device ID lock
Confirm that the device ID was copied from that exact client, is active, and has not expired. If multiple IDs were added, make sure each is on its own line or separated with a semicolon in the Panel entry.
The configuration imports but cannot connect
An import confirms that the configuration can be read; it does not validate the remote service. Recheck the endpoint, port, account status, tunnel type, payload, SNI, proxy, DNS, and provider-side restrictions. Change one verified value at a time so the cause remains clear.
Frequently asked questions
Does the Panel create a remote SSH, VPN, or V2Ray account?
No. The Panel stores and delivers a configuration. The remote account or profile must come from your own infrastructure or an authorized provider.
Do I need both a Cloud Password and a Device ID lock?
No. They are optional access controls. Use the one that matches your delivery policy, test it on the intended client, and avoid adding a restriction you cannot support.
Can the client import something other than a Cloud key?
Yes. The client import menu also shows Paste Config, Import File, and Scan QR. This guide uses Cloud import because the video demonstrates delivering the Panel Config Key to a client.
Can I change a tweak or server after sharing the key?
Yes, the configuration remains manageable in the Panel. Re-test the client experience after any resource or access-policy change, especially when you change a tunnel type, category, password, or device rule.
Video companion
For the complete visual walkthrough, watch HTTP Tweak Panel: Create and Manage Configurations, Tweaks, Servers, and Client Access on YouTube. This article is designed to remain useful as a written, step-by-step reference when you are not watching the video.